LIP MAPPING TRAINING FOR LIP BLUSHING DALLAS

Lip mapping starts before a pencil ever touches the skin. The first skill is learning to look at the lips that are actually in front of you.


Every natural lip has its own structure. The Cupid’s bow can be sharp, soft, high or barely defined. One side of the upper lip can rise differently from the other. The lower lip can carry more volume on one side. The vermilion border can be crisp in one area and less visible in another. The upper and lower lips can have very different proportions. Those differences are not something an artist should automatically try to erase. They are information.


At BrowBeat Certification, we teach Lip Blush students to approach mapping as an assessment and design process. The objective is not to memorize one lip shape and reproduce it on every person. The objective is to understand the natural lip well enough to create a balanced pre-draw that respects the anatomy already there.

That distinction matters because mapping creates the plan for everything that follows.


Before pigment selection. Before saturation. Before machine work. Before the first pass. The artist needs to know where they intend to work and why.


This guide focuses specifically on that planning stage. For the complete professional program that connects mapping with color, machine technique, Lip Blushing and Dark Lip Neutralization, explore our Lip Blushing Certification & Training in Texas.


What Is Lip Mapping Training?


Lip mapping training teaches PMU students how to assess the natural lips and translate what they see into a clear pre-draw for a Lip Blushing procedure. It combines observation with design.


A student learns to identify important lip landmarks, evaluate the relationship between the upper and lower lip, assess visible asymmetry, understand the natural vermilion border and create a design that works with the individual lip.


This is why lip mapping is different from simply tracing around the mouth. A trace records an outline. A professional mapping process requires decisions.


The artist needs to determine which natural landmarks should guide the design, where balance needs to be evaluated, how the Cupid’s bow relates to the rest of the upper lip and whether an apparent difference is something that should influence the pre-draw. Mapping is also separate from machine technique. 


Mapping answers: Where are we planning to work? Machine technique answers: How are we going to implant pigment within that plan? Keeping those two skills separate while learning makes both easier to understand.

Lip mapping training Dallas students learning lip anatomy before mapping practice Subject: Lip anatomy theory before mapping
UNDERSTANDING LIPS BEFORE

MAPPING

Begins

Every lip mapping training experience starts with understanding lip anatomy. Students explore natural lip structure, movement, and shape variation across clients before mapping even begins. In Dallas classrooms, this theory phase helps students approach lip blushing mapping technique with observation first, drawing later.

a 2 - day lip blushing

learning

Journey

This Dallas course unfolds over two days — lip blushing on Day 1 and dark lip neutralization on Day 2. Lip mapping training becomes the common thread connecting both services, ensuring students understand how mapping supports the lip tattoo application process.

Lip mapping training Dallas two day lip blushing and dark lip equalization course
Vermilion border mapping demonstration during Dallas lip mapping training course
vermillion border rules students

can

Trust

The vermilion border becomes a focal point during lip mapping training. Trainers explain placement rules that help students respect natural lip edges while still creating design. This clarity strengthens lip outline mapping tutorial comprehension.

the 1 - 2mm rule students

can

Trust

One of the most discussed lip tattoo mapping method concepts is the small but meaningful 1–2 mm wiggle room at the lip edge. Dallas students learn how this margin influences lip size, shape and final outcome during lip mapping training exercises.

Lip mapping training 1-2 mm lip edge rule Dallas lip outline mapping tutorial
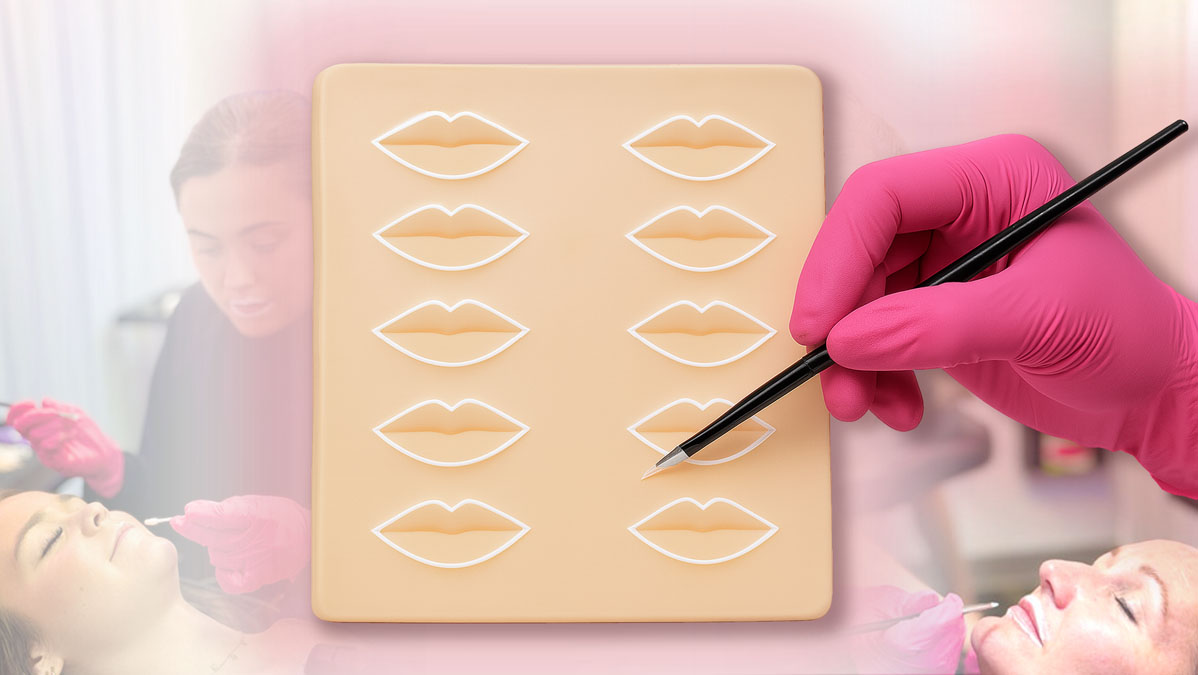
Dallas students practicing lip symmetry mapping tattoo on silicone lips
3d silicone lip mapping

practice

Exercise

Before partner mapping begins, students repeat lip mapping training steps on 3D silicone lips. This repetition allows them to explore lip symmetry mapping tattoo concepts without pressure while reinforcing the step-by-step lip mapping education taught in class.

partner mapping introduces

real

Variation

Partner mapping is where lip mapping training becomes dynamic. Students encounter real lip shapes, asymmetry, and structural differences while applying lip blushing mapping technique under trainer supervision.

Dallas students performing partner mapping during lip mapping training course
Trainer assisting student during Dallas lip tattoo mapping method training
trainer guidance in

real

Time

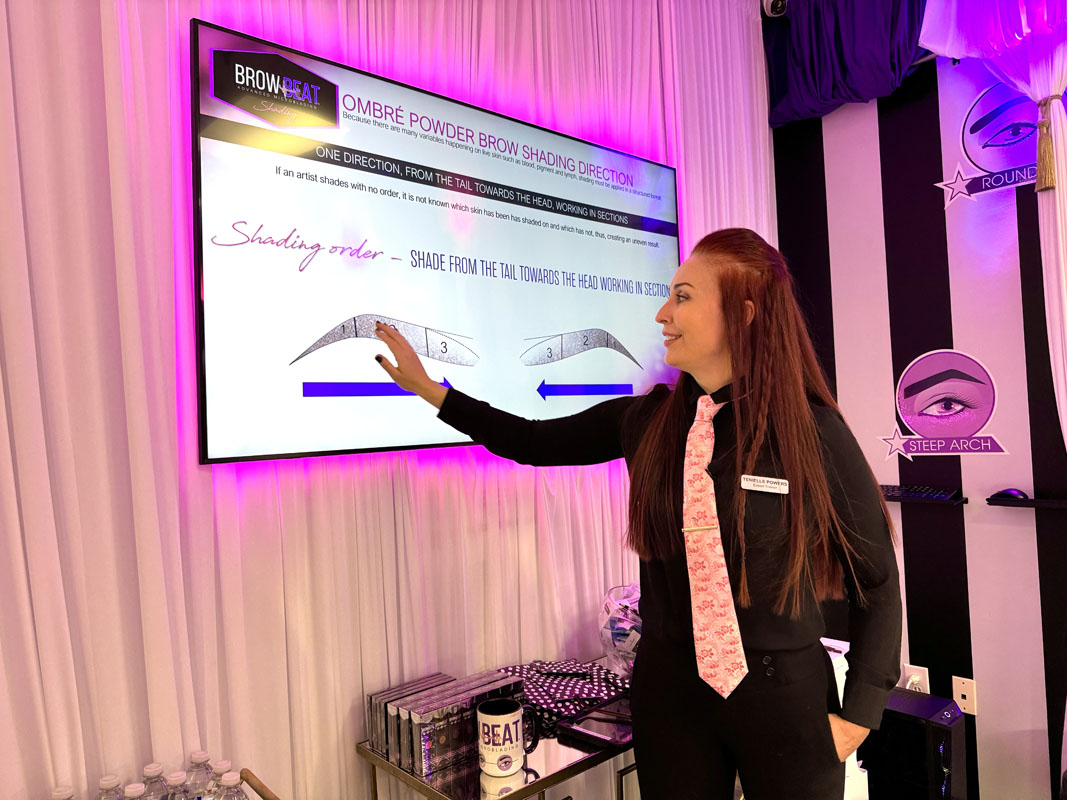
Photos often capture trainers stepping beside students to refine a line or explain a placement decision. These moments highlight how lip tattoo mapping method learning happens through interaction, correction, and encouragement.

day - 2, continuity into

dark lip

Neutralization

Day 2 introduces dark lip neutralization while maintaining lip mapping training continuity. Students recognize that lip tattoo mapping method principles remain consistent even as treatment goals evolve.

Lip tattoo mapping method Dallas continuing into dark lip equalization training
Lip mapping training interactive learning Dallas lip symmetry mapping tattoo class
questions

drive

Understanding

Students are encouraged to ask questions throughout mapping exercises. This interactive environment allows lip symmetry mapping tattoo concepts to be clarified immediately, strengthening understanding and reducing hesitation.

learning how

lips

Behave

Students quickly discover lips aren’t static surfaces. Movement, hydration, and tissue flexibility all influence mapping. Lip mapping training encourages students to understand lip anatomy, so lip symmetry mapping tattoo decisions reflect understanding.

Lip mapping training cupid bow mapping Dallas lip blushing mapping technique
cupids bow mapping comes

to

Life

Cupid’s bow mapping defines the look. Students learn how to identify peaks, symmetry points, and subtle asymmetries while practicing lip blushing mapping technique within trainer-guided presentations.

repetition turns theory

Into

Memory

Through repeated silicone mapping, lip outline mapping tutorial principles become muscle memory. Dallas classrooms often capture students fully immersed in practice — refining placement, adjusting symmetry, and gaining confidence with each attempt.

Lip mapping repetition Dallas students repeating lip outline mapping tutorial steps
Lip mapping training Dallas preparing students for lip blushing pigment application
preparing for

lip blushing

Application

As Day 1 progresses, students begin seeing how lip blushing mapping technique directly prepares them for pigment placement. Mapping transitions from exercise to treatment preparation within the Dallas classroom experience.


Why Lip Mapping Starts With the Natural Lip


A common mistake in beauty design is to begin with an idealized shape and try to make the person fit it. We teach the opposite. Start with the person. Before drawing anything, look at the lips at rest. Look at the natural peaks and curves. Look at the relationship between the center of the mouth and the corners. Look at how the upper lip sits against the lower lip. Look at where the natural border is clearly visible and where it becomes softer. Then look again.


The purpose of this observation is not to hunt for imperfections. It is to understand the structure you are about to work with. Human faces are not perfectly symmetrical. Lips are no exception. If a student approaches every natural difference as a problem that needs to be “fixed,” they can begin designing away from the actual anatomy. A better approach is to understand which differences matter to the visual balance of the design and which are simply part of a normal human face. This is where good mapping becomes judgment rather than tracing.

The student begins asking better questions:


  • Where does the natural lip actually begin and end?
  • How is the Cupid’s bow formed on this person?
  • Are the two peaks naturally positioned at the same height?
  • How does the upper lip relate to the lower lip?
  • Where is the vermilion border clearly visible?
  • Does the asymmetry come from the lip itself or from how the mouth is resting?
  • What should remain untouched because it is simply part of the person’s natural anatomy?
 

Those questions create a much stronger foundation than beginning with a predetermined lip template.


Understanding the Landmarks of the Lips


Students become better at mapping when they stop seeing the lips as one continuous outline and begin recognizing the landmarks that create the overall shape.


The upper lip has its own architecture. The lower lip has its own. The corners connect them, while the Cupid’s bow creates a central reference point for the upper lip. The vermilion border defines the visible transition between the lip tissue and surrounding skin. Together, these landmarks help the artist understand the existing structure before designing the pre-draw.


That does not mean every landmark needs to be exaggerated. A naturally soft Cupid’s bow does not need to become dramatically pointed simply because a student knows where the peaks are. A full lower lip does not need to be visually reduced because it does not match an arbitrary ratio. A naturally flattering upper lip does not need to be redesigned into someone else’s anatomy.


The purpose of identifying landmarks is to create reference points. They help the student understand where they are, what they are looking at and how one part of the lip relates to another.


Mapping the Cupid’s Bow


The Cupid’s bow is one of the most recognizable landmarks of the upper lip, and it is also one of the areas where inexperienced mapping can quickly become overdesigned. The two peaks are not automatically identical. One can sit slightly higher. One can be sharper. The center between them can be deep or shallow. On some lips, the Cupid’s bow is highly defined. On others, it is naturally soft. Students need to identify the existing structure before deciding how the pre-draw should follow it.


The goal is balance, not the creation of two artificial points simply because a textbook illustration shows a perfectly mirrored Cupid’s bow. This is also why assessing the Cupid’s bow in isolation is not enough. Its position needs to make sense in relation to the rest of the upper lip. A beautiful center that does not transition naturally into the sides of the lip is not a successful design.


During mapping education, students learn to see the Cupid’s bow as part of the complete lip rather than as a decorative feature added to the middle.


Understanding the Vermilion Border


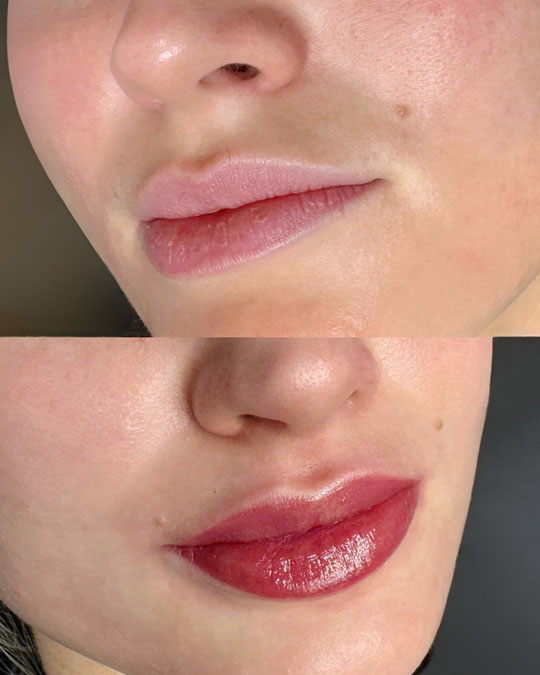
The vermilion border is the natural boundary between the colored lip tissue and the surrounding skin. For Lip Blushing, understanding that border is essential because it helps define the appropriate working area.


On some lips, the border is visually obvious. On others, portions of it are softer or less distinct. Existing natural color can also make one area easier to identify than another. The student therefore needs to learn to assess the border rather than simply draw where they think a lip would look fuller. This is an important distinction.


Lip mapping is not an exercise in inventing additional lip tissue. A pre-draw should be grounded in the natural lip anatomy. That is why mapping education needs to include more than the instruction to “follow the border.” Students need to learn how to identify the border when it changes in visibility and how to consider the complete shape instead of making isolated adjustments that distort the overall design.


Upper and Lower Lip Proportion


Proportion helps the student understand how the upper and lower lips relate to each other. There is no single lip ratio that every person needs to have. Natural lips come in an enormous range of shapes. Some people have a fuller lower lip. Some have more visible upper-lip volume. Some have relatively equal upper and lower lips. Others have a pronounced difference between them.


The mapping process begins by recognizing that relationship rather than trying to force every person toward one predetermined proportion. Students should look at the lips as a pair. If the upper lip is mapped without considering the lower lip, or the lower lip is designed independently from the upper lip, the complete result can lose visual balance.


Proportion is therefore less about memorizing a number and more about developing the ability to compare. How does the center of the upper lip relate to the center of the lower lip? How do the outer portions transition toward the corners?


Does the proposed design still look like it belongs to this person’s natural mouth?

These are visual decisions, and students become more confident in them through repeated assessment and practice.


Lip Symmetry Does Not Mean Chasing Perfection


Symmetry is one of the most misunderstood parts of lip mapping. Students often assume the goal is to make the left and right sides mathematically identical. Human anatomy does not work that way. The face itself contains natural differences. The lips move. Facial muscles influence the mouth. The way someone holds their jaw or rests their lips can change what the artist sees from one moment to the next.


Professional mapping therefore requires more judgment than drawing one side and mechanically copying it onto the other. The artist needs to distinguish between an imbalance in the proposed design and a normal anatomical difference that should remain part of the person’s face. That means stepping back from the individual line and evaluating the lips as a whole.


A pre-draw can look technically tidy at close range and still feel wrong when viewed on the complete face. Students should learn to check both. Close observation helps with precision. Stepping back helps with balance. Both matter.


Mapping Naturally Asymmetrical Lips


Natural asymmetry does not give the artist permission to redraw the lips into an entirely different shape. Instead, it gives the artist more information to assess.


When one side appears different from the other, the first job is to understand what is creating the difference. Is one Cupid’s bow peak naturally higher? Does one side of the upper lip carry more visible volume? Is the mouth being held slightly to one side? Does the lower lip sit differently because of the person’s natural facial structure? Is the visible border simply clearer on one side? Those observations matter because not every apparent asymmetry should be approached in the same way.


A student who immediately starts adding to one side can create a second problem instead of solving the first. The mapping stage gives the artist time to assess before anything permanent is introduced. That is one of its greatest advantages. Draw. Look. Compare. Reassess. Adjust where appropriate. The pre-draw is a planning tool, not a race to reach the machine.


Mapping Different Natural Lip Shapes


There is no single lip shape that students should expect to encounter. Some lips are naturally full. Others are thin. Some have a pronounced Cupid’s bow, while others have a softer upper-lip shape. One person can have a fuller lower lip and a narrow upper lip. Another can have relatively even proportions between the two. The mapping process needs to adapt to the anatomy instead of forcing the anatomy to adapt to the mapping.


This is one of the reasons repeated mapping practice matters. If a student practices only one type of lip, it becomes easy to mistake familiarity with that shape for mastery of mapping itself. The real skill is being able to look at different natural lips and still identify the landmarks, proportions and relationships that guide the design.


Mapping Thin Lips


Thin lips require restraint. The temptation is to use the pre-draw to create the appearance of substantially more lip than the natural anatomy provides. That changes the purpose of mapping. Mapping is not a method of manufacturing new lip tissue.


The student should first identify the true natural border, understand the existing proportions and design within the anatomy that is actually present. A thinner lip still has a Cupid’s bow, corners, an upper-to-lower relationship and a natural border. Those landmarks remain the foundation of the design.


Mapping Full Lips


Full lips present a different visual challenge because there is more surface area to assess. The student still needs to evaluate the complete shape rather than assuming fullness automatically creates balance.


A full lower lip can dominate visually while the upper lip has a softer structure. A full upper lip can have an uneven Cupid’s bow. The outer portions of the lip can transition differently on the left and right sides. Volume does not remove the need for mapping.


The same principles remain: identify the anatomy, evaluate the landmarks and create a pre-draw that follows the natural structure.


Mapping Lips With Uneven Natural Proportions


Uneven proportions require the student to look at the relationship between areas rather than focusing on one isolated difference. A narrow upper lip paired with a fuller lower lip is not automatically a mapping problem. It is a natural proportion that needs to be understood.


Likewise, one side appearing slightly fuller does not mean the artist should immediately compensate by adding the same amount to the opposite side. The student needs to evaluate what is anatomically present and what produces the most balanced design while remaining faithful to the natural lip.


The Lip Pre-Draw: Turning Assessment Into a Working Design


Assessment happens in the artist’s mind. The pre-draw turns that assessment into something visible. This is the point where observations about shape, symmetry, proportion, the Cupid’s bow and the vermilion border become a working design. A good pre-draw gives the artist an opportunity to evaluate the complete plan before machine work begins.


That is important because once students begin concentrating on the technical demands of using a PMU machine, it becomes much harder to simultaneously redesign the lips. The planning should already have happened. The pre-draw creates that separation. First, decide where you intend to work. Then execute within the plan.


This is why we do not treat pre-drawing as an unnecessary preliminary step. It is part of the artist’s decision-making process. A student should be able to look at the completed pre-draw and understand why the design is positioned where it is.

If the only explanation is “because that is where I drew the line,” the assessment is not finished.


How to Check a Lip Map Before Moving Forward


Finishing the initial pre-draw does not mean the mapping process is finished.

The next step is evaluation. Students need to develop the habit of checking their own work rather than becoming attached to the first version they draw.


Look at the center. Look at the Cupid’s bow. Look at the upper lip as a complete shape. Look at the lower lip. Compare the left and right sides. Then stop looking only at the lips. Look at the face. A map needs to work at both levels.


This is where small drawing errors often become easier to recognize. A line can look reasonable when viewed by itself but appear visually heavy when the entire mouth is considered. A Cupid’s bow can look symmetrical at close range but feel slightly displaced when viewed in relation to the center of the face. Checking from more than one visual perspective teaches students not to confuse precision with tunnel vision.


Common Lip Mapping Mistakes Students Make


Most early mapping problems are not caused by students being incapable of drawing a lip. They happen because the student is concentrating on the wrong thing. Understanding the reason behind the mistake makes it much easier to correct.


Trying to Create a “Perfect” Lip Instead of Mapping the Natural Lip


This happens when the student begins with an image of what lips are supposed to look like rather than assessing the person in front of them. The result can be a technically neat drawing that does not belong to the face. The correction is conceptual: stop designing from a template and return to the anatomy.


Looking at One Side at a Time


Students can become so focused on perfecting one curve that they lose sight of how it relates to the opposite side. Lip mapping needs constant comparison. A strong left side does not help if the complete design loses balance.


Overcorrecting Natural Asymmetry


Seeing a difference does not automatically mean the artist needs to eliminate it.

The student first needs to understand the source of the asymmetry and determine whether changing the pre-draw actually improves the design. More correction is not automatically better mapping.

Drawing Outside the Natural Lip to Create Fullness


Mapping should remain grounded in the natural lip anatomy. The pre-draw is not an opportunity to manufacture substantially larger lips by moving the working area onto surrounding facial skin. Students need to become confident identifying the natural vermilion border instead of moving the design simply because a larger shape appears desirable.

Making the Cupid’s Bow Too Sharp


A student who knows the Cupid’s bow is an important landmark can accidentally overemphasize it. Not every person has sharply defined peaks. If the natural Cupid’s bow is soft, the map should respect that structure rather than creating two dramatic points that look disconnected from the rest of the upper lip.

Checking the Drawing Without Checking the Face


A close-up view is useful for line placement. It is not enough for judging the complete design. Students need to step back and assess how the mapped lips sit within the face. Mapping is both a detail skill and a whole-face design skill.

Rushing Through the Pre-Draw to Get to the Machine


The machine can feel like the “real” procedure to a new student, which makes mapping feel like something to finish quickly. That thinking reverses the process. The pre-draw is where the artist gets to make design decisions without simultaneously managing pigment implantation. Use that opportunity. Once the design is clear, the student can concentrate on execution instead of trying to solve a mapping problem while working with the machine.

Lip Mapping and Machine Technique Are Different Skills


Mapping and machine technique meet during a Lip Blushing procedure, but students learn more effectively when they understand the job of each skill. Mapping is planning. Machine technique is execution. During mapping, the artist evaluates anatomy, establishes the design and decides where the intended working area belongs.

During machine work, the artist physically implants pigment with controlled movement inside that established plan. A beautiful map does not automatically create good machine technique. Good machine control does not rescue a poorly considered design. Both matter, and neither replaces the other. This separation is particularly useful for students because it allows them to identify what they actually need to improve. If the shape is wrong before machine work begins, the problem is not needle depth.

If the pre-draw is balanced but the resulting saturation is inconsistent, the student needs to examine execution rather than redesigning the map. Knowing which skill produced the problem is part of learning how to improve it. For detailed education on physical implantation skills, visit our Machine Technique Training for Lip Blushing guide.


Lip Mapping and Pigment Selection Are Different Decisions


Mapping determines the planned shape and working area. Pigment selection determines the color direction. Those decisions influence the same procedure, but they answer different questions. The artist can assess natural lip color while evaluating the lips, particularly because variations in color can affect how clearly the natural border appears. But that does not turn mapping into a color-theory exercise.


Once the shape has been assessed, pigment education becomes its own subject.

Students need to understand the difference because separating the decisions prevents one skill from becoming a substitute for another. A beautiful pigment choice cannot correct a poorly planned shape. And a beautifully mapped lip does not tell the artist which pigment direction is appropriate.


For detailed education on desired Lip Blush color, pigment selection, mixing and healed-color considerations, explore our Lip Pigment & Color Training guide.


Mapping Dark and Melanin-Rich Lips


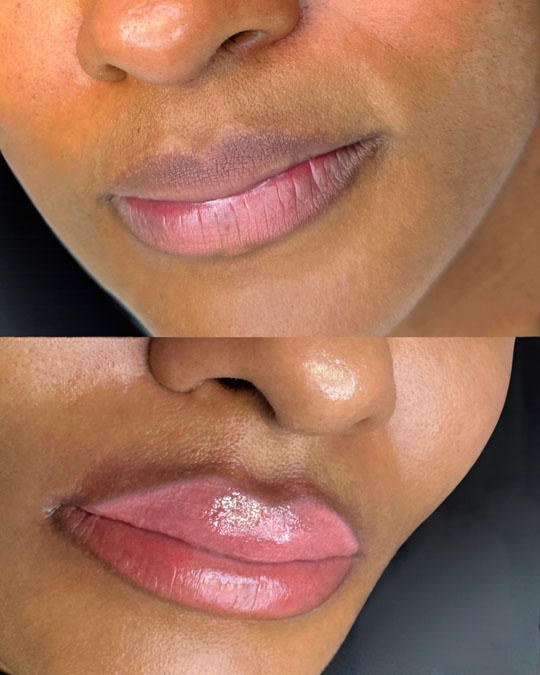
The fundamental purpose of mapping remains the same when working with darker and melanin-rich lips: understand the natural anatomy and establish the planned working area before pigment implantation. The presence of darker natural color does not change mapping into a color-correction lesson.


Students still need to identify the Cupid’s bow, evaluate the vermilion border, assess proportion and look at the overall balance of the lips. What changes later is the color reasoning.


When existing melanin-rich color requires a corrective pigment strategy, that decision belongs to Dark Lip Neutralization education rather than general mapping.

Keeping that distinction clear is important for students. First understand the structure. Then understand the color problem. Then determine the appropriate technical plan.


For specialized color education involving Fitzpatrick 4–6 and melanin-rich lips, continue to our Dark Lip Neutralization Training guide.


How Students Learn Lip Mapping Through Structured Practice


Lip mapping improves through repetition, but repetition only helps when the student understands what they are practicing. Drawing the same memorized lip repeatedly teaches the student to reproduce that drawing. It does not automatically teach them to map different people. Useful practice requires variation.


Students need to become comfortable looking at different natural lip structures, identifying landmarks and making design decisions from what they see. They also need to learn to evaluate their own work.


  • Where is the center?
  • Does the Cupid’s bow make sense for this lip?
  • Is the border grounded in the natural anatomy?
  • Do the upper and lower lips work together?
  • Did an attempt to create symmetry actually distort the natural shape?
  • Can the student explain why they placed each part of the design where they did?
 

That last question matters. A student who can explain the reasoning behind a map is developing a transferable skill. A student who can only reproduce the instructor’s drawing is still dependent on that one example.


The purpose of professional Lip Blush mapping education is to move beyond copying and begin developing the student’s own ability to assess. Professional lip mapping training therefore needs to develop more than drawing accuracy. Students need repeated opportunities to assess different lip shapes, create a design, review their own decisions and understand why one mapping choice works better than another.


That is the difference between practicing a lip drawing and developing a lip mapping skill. One teaches the hand to repeat a shape. The other teaches the student how to approach a shape they have never mapped before.


Lip Mapping Training for Beginners


Beginners can learn lip blushing and lip mapping, but the goal should not be to memorize one finished lip shape. A new PMU student first needs a reliable way to organize what they are seeing.


  • Where is the center?
  • Where are the natural Cupid’s bow peaks?
  • How does the upper lip relate to the lower lip?
  • Where is the vermilion border?
  • What natural asymmetry is present?
  • Which parts of the design are being guided directly by the anatomy?

Those questions give beginners a starting framework. As the student practices, the process becomes less about remembering what the instructor drew and more about recognizing the landmarks independently.


This is why beginner lip mapping education should develop the eye and the reasoning at the same time as the hand. A student who learns only to reproduce one instructor example can become stuck as soon as a different natural lip shape appears. A student who understands the assessment process has something they can reuse.


That progression—from guided observation to independent design—is the foundation of professional lip mapping skills.


From Mapping Practice to a Repeatable Assessment Process


As students gain experience, lip mapping should become less about remembering individual lines and more about following a reliable way of thinking. The exact lips change. The assessment process remains.


  • Start with the natural anatomy.
  • Identify the landmarks.
  • Find the center.
  • Evaluate the Cupid’s bow.
  • Assess the vermilion border.
  • Compare the upper and lower lips.
  • Look for natural asymmetry.
  • Create the pre-draw.
  • Then stop and evaluate it before moving forward.

This creates a repeatable framework without creating a one-shape-fits-everyone template. That difference is important. A process gives the artist a sequence of questions to answer. A template gives the artist a predetermined answer. We want students to develop the first.


Why Good Lip Mapping Is a Decision-Making Skill


Drawing ability helps with mapping, but drawing alone is not the skill we are trying to develop. The larger skill is decision-making. A student needs to decide which natural landmarks are guiding the design. They need to decide whether a visible difference needs an adjustment or simply needs to be respected. They need to decide when a line follows the natural border and when it has begun drifting away from it.


That is why two students can look at the same lips and produce very different maps. The quality of the map reflects what each student noticed and how they interpreted it. Training therefore needs to develop the student’s eye as well as their hand. The hand draws the line. The eye and the reasoning determine where that line belongs.


This becomes increasingly important as students encounter lips that do not resemble the clean diagrams typically used to introduce anatomy. Real lips move. They have texture. Their borders vary in definition. Their proportions differ. Their symmetry is imperfect. Professional mapping means learning to make thoughtful decisions within that reality.


Why Mapping Comes Before Lip Blushing Machine Work


A clear map reduces the number of decisions an artist needs to make once machine work begins. That matters because machine execution requires its own concentration. The artist needs to control movement, pressure, depth, speed and pigment implantation. If they are simultaneously trying to decide where the border belongs or whether the Cupid’s bow is balanced, two different skill problems have been combined unnecessarily. Mapping separates them. During the design stage, focus on design. During the technical stage, focus on execution.


This does not mean the artist stops observing once machine work begins. It means the major shape decisions have already been considered before pigment implantation starts. That is one reason we consider mapping part of the procedure rather than simply preparation for the procedure.


Learning Lip Mapping in an Instructor-Led Training Environment


Lip mapping is a visual skill, which makes feedback important while the student is developing their eye. A student can look at their own pre-draw for several minutes and still miss the reason it feels unbalanced. Another set of trained eyes can identify the issue immediately. Perhaps the Cupid’s bow has shifted away from the natural center. Perhaps one side has been extended while trying to create symmetry. Perhaps the student is looking so closely at one curve that they have stopped evaluating the entire mouth.


Instructor-led lip mapping training gives students an opportunity to create the design, evaluate it and understand what should change before the design becomes part of machine execution. That feedback helps turn practical mapping exercises into professional decision-making skills.


The aim is not for the student to become permanently dependent on an instructor checking every map. The aim is to teach the student what to look for so they become increasingly capable of checking their own work.


Lip Mapping Training Within BrowBeat Certification


At BrowBeat Certification, lip mapping is taught as part of the larger reasoning process behind professional Lip Blushing. Students are not learning a decorative outline that exists separately from the rest of the procedure.


They are learning how assessment becomes a design, how that design creates a working plan and how the plan later connects with color and machine execution.

This is also why we do not want students to rush through mapping simply to reach the technical portion of training. The machine does not decide the shape. The pigment does not decide the shape. The artist does. That decision needs to happen deliberately.


Learn Lip Mapping as Part of the Complete Lip Blushing Process


A strong Lip Blush map does not come from memorizing the “perfect” pair of lips.

It comes from learning how to see. Look at the natural anatomy. Identify the landmarks. Understand the proportions. Evaluate the asymmetry. Build the pre-draw from what is actually there. Then check it before moving forward. That process gives the artist something much more useful than a template: a way to approach lips they have never seen before.


BrowBeat Certification teaches lip mapping as one part of a complete Lip Blushing education that connects assessment, design, color understanding and controlled technical execution.


Lip Mapping Training FAQs

What is lip mapping in Lip Blushing?

Lip mapping is the planning process used to assess the natural lips and create a pre-draw before pigment implantation. It defines the intended shape and working area by evaluating the Cupid’s bow, vermilion border, proportions, symmetry and natural lip anatomy.

Lip mapping gives the artist a clear design before machine work begins. It allows shape, proportion and symmetry decisions to be checked and adjusted before pigment is implanted.

No. Tracing follows an outline, while professional lip mapping requires assessment and design. The artist studies the natural anatomy and decides how the pre-draw should relate to the lips already present.

A PMU artist should assess the natural lip shape, center, Cupid’s bow, vermilion border, upper-to-lower lip relationship, proportions and visible asymmetry before completing the pre-draw.

The Cupid’s bow is the central shape of the upper lip created by its two natural peaks and the curve between them. It is an important reference point for establishing the upper-lip design.

No. Natural Cupid’s bows are not always perfectly symmetrical. The goal is to create visual balance while respecting the person’s existing anatomy.

The vermilion border is the natural boundary between the colored lip tissue and the surrounding facial skin. Lip mapping uses this border to help establish the appropriate working area for Lip Blushing.

No. Lip mapping should remain grounded in the natural lip anatomy. The pre-draw should not be used to create substantially larger lips by extending the working area onto surrounding facial skin.

First identify what is creating the asymmetry. Evaluate the Cupid’s bow, border, proportions, natural volume and the way the mouth is resting before deciding whether an adjustment improves the overall balance.

No. Human lips are naturally asymmetrical. Professional mapping creates balance without forcing the lips into artificial mathematical symmetry.

Thin lips are mapped by identifying the true natural border, Cupid’s bow, corners and upper-to-lower relationship. The design should respect the existing anatomy rather than attempting to manufacture additional lip tissue. Forcing the lip the be larger can result in moving into facial skin rather than lip tissue.

Yes. Full lips still require assessment of shape, border, proportions, symmetry and the relationship between the upper and lower lip. Natural fullness does not remove the need for a deliberate pre-draw.

A lip pre-draw is the visible design created before pigment implantation. It translates the artist’s assessment of shape, anatomy, landmarks and balance into a working map that can be reviewed before machine work begins.

The map should be checked close-up and from a wider view of the face. The artist should review the center, Cupid’s bow, upper and lower lip relationship, borders and overall visual balance before moving forward. This may also include asking the client to talk to view the lip during animation.

Yes. Beginner lip mapping training starts with learning how to identify natural landmarks, assess proportion and symmetry, recognize the vermilion border and turn those observations into a pre-draw. The goal is to develop a repeatable assessment process.

Students practice assessing different natural lip shapes, identifying landmarks, comparing proportions, evaluating symmetry and turning those observations into a working pre-draw. Practice also teaches students how to review and correct their own design decisions.

Instructor feedback helps students identify design problems they do not yet recognize independently. The purpose is to develop the student’s own ability to assess balance, anatomy and placement so they become increasingly capable of evaluating their own maps.

No. Lip mapping is planning; machine technique is execution. Mapping determines where the artist intends to work, while machine technique controls how pigment is physically implanted within that plan.

No. Lip mapping determines shape and the planned working area. Pigment selection determines the color direction.

The core mapping process remains focused on anatomy, landmarks, proportion and the natural border. Corrective color strategy for dark or melanin-rich lips is a separate skill.

Students improve by repeatedly assessing and mapping different natural lip shapes. Strong practice develops the ability to identify landmarks, compare proportions, recognize asymmetry and explain why each part of the design is placed where it is.