MACHINE TECHNIQUE TRAINING FOR LIP BLUSHING
The goal is not to make the machine move. The goal is to understand what your movement is doing. That difference is at the center of how we teach Lip Blushing machine technique at BrowBeat Certification.
A student can watch an experienced artist move across a lip and see what appears to be a simple, repetitive motion. But inside that movement, several things are happening at once.
The machine is running. The needle is moving. The artist’s hand is moving. The working angle is changing as the lip curves. Pressure is being controlled. Depth is being controlled. The tissue is responding. Pigment is being implanted, and the artist is constantly evaluating how much coverage has already been created and what still needs to be done.
That is why Lip Blushing is a physical skill, not a movement to memorize. Students need to understand how the pieces work together. They also need a workflow.
Where are you beginning? How are you moving through the lip? How are you transitioning from one area to another? What did the first pass accomplish? Where does the coverage need more work? Where does it not? How much saturation fits the intended result? When is the lip telling you that enough is enough? Machine technique is where those decisions become physical.
This guide focuses on execution: movement, positioning, speed, pressure, depth, passes, workflow, saturation, needles, cartridges and controlled pigment implantation. For the complete professional program connecting these skills with mapping, color and Dark Lip Neutralization, explore our Lip Blushing Certification & Training in Texas.
Lip Blushing Is a Physical Skill
Understanding Lip Blushing intellectually and being able to execute it with a PMU machine are two different things. A student can understand that saturation should be even and still struggle to create it.
They can know that the border should remain controlled and still have difficulty keeping their movement consistent as the lip curves. They can understand what pressure means and still need practice developing a hand that does not become heavier when they concentrate. This is normal skill development.
The solution is not another rule to memorize. It is learning how the machine responds to the hand and then practicing those relationships deliberately.
Machine technique becomes more understandable when students stop thinking about “the technique” as one giant skill and begin separating it into smaller controls.
- How am I holding and positioning the machine?
- What angle am I working at?
- How is my hand moving?
- How fast am I moving?
- How much pressure am I applying?
- What depth am I actually working at?
- How is the tissue responding?
- How evenly is pigment being implanted?
- What did this pass accomplish?
- Does this area need more work?
Once students can identify those individual variables, they can begin understanding why the result changes when one of them changes.

lip blushing
Certification
Lip blushing machine technique training is delivered as part of a structured 2-day Texas certification covering both lip blushing and dark lip neutralization. Students learn how PMU machine technique for lips adapts across services, creating a connected workflow where machine movement, pigment layering, and treatment sequencing function together.
workflow
Foundations
Before machine contact begins, students explore how lip blushing machine technique fits into the full PMU lip application method. Workflow theory clarifies treatment order, machine transitions, and shading strategy so artists understand why each movement occurs. This knowledge strengthens lip shading machine technique consistency and prepares students for controlled practical application.


shading
Practice
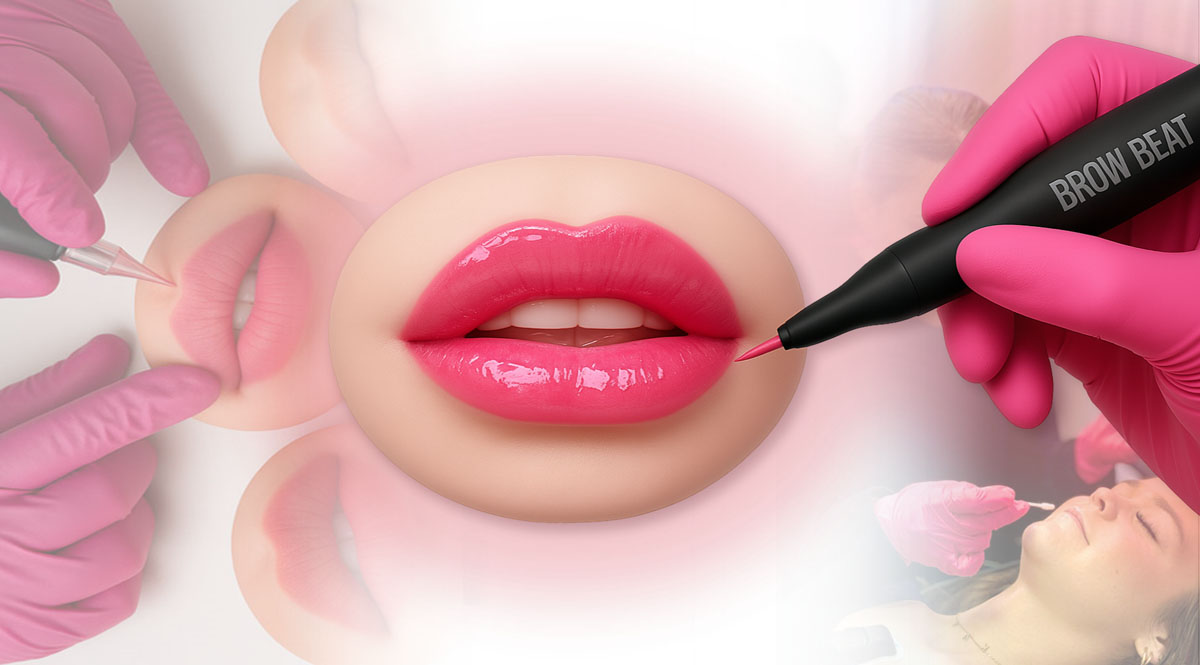
Three-dimensional silicone lips allow students to practice lip tattoo machine shading with realistic contours and resistance. These exercises support early understanding of machine rhythm, whip shading spacing, and movement direction. Practicing how to use a PMU machine for lip blushing on dimensional surfaces helps build confidence before progressing into collaborative exercises.
machine
Preparation
Partner mapping exercises introduce lip draft workflow prior to machine use. Instructor guidance ensures students understand how mapping influences subsequent lip shading machine technique. This stage connects design planning with machine execution, strengthening the overall lip blushing machine technique workflow.


machine
Control
Students begin machine practice using silicone lip headbands for lining exercises where mistakes carry no consequence. This environment allows artists to explore PMU machine techniques for lips while developing hand stability, directional awareness, and control. Removing performance pressure encourages experimentation and strengthens early machine confidence.
machine
Techniques
After lining control develops, students transition into partner silicone lip filling exercises focused on layered color saturation. This stage emphasizes lip shading machine technique consistency, machine rhythm awareness, and progressive saturation building. Artists practice controlled filling patterns that mirror real lip blushing workflows without introducing live tissue variables.


technique
Success
Lip blushing machine technique training includes color theory education alongside a professional pigment kit used throughout practical machine exercises. Students learn how lip tone, pigment selection, and color interaction influence the way machine shading is planned and performed. Understanding these variables helps students make informed pigment choices before application begins and adapt their machine technique to create controlled, even color across varied lips.
fitzpatrick
1 - 2
This Fitzpatrick 1-2 before and after demonstrates lip blushing machine technique on lighter lip starting points where controlled saturation and layering precision are essential. The result reflects how lip tattoo machine shading builds visible color while maintaining even saturation.


fitzpatrick
3 - 4
This Fitzpatrick 3-4 example highlights balanced lip shading machine technique where depth, undertone management, and machine rhythm create cohesive color enhancement. The before and after reflects how lip blushing machine technique supports smooth saturation and even application across mid-range lip tones, reinforcing adaptable PMU machine technique for lips.
fitzpatrick
5
This Fitzpatrick 5 before-and-after demonstrates lip blushing machine technique on medium to high melanin lips. Controlled machine shading builds even pigment saturation while respecting the natural variation in lip tone. The finished result shows how consistent movement, pressure, and pigment placement support smooth, cohesive color across the lips.

Machine Control Starts Before the Needle Touches the Lip
Control begins with positioning. If the artist is uncomfortable, reaching, twisting or trying to work an area from a poor position, controlling the machine becomes unnecessarily difficult.
The student needs to think about where they are sitting, where the working area is positioned and whether their hand can move through that area without fighting their own body position. This becomes especially important on lips because the working surface changes continuously. The upper lip is not the lower lip. The center is not the corner.
The right side is not the left side from the artist’s working position. A student should not expect to sit in one fixed position and reach every area simply because the client has not moved.
The artist repositions.
The hand repositions.
The machine repositions.
The working angle is re-established.
That is part of technique.
Why We Teach the Machine at 90 Degrees to the Working Surface
Machine positioning is one of the details students need to understand early.
At BrowBeat, we teach students to maintain the machine at approximately 90 degrees to the specific lip surface being worked. That last part matters. The lips curve. So 90 degrees is not one frozen position in space.
As the artist moves across the lip, the working surface changes. The machine and hand need to reposition with that surface so the needle continues approaching the area perpendicularly rather than gradually leaning farther and farther away from the intended working angle. This requires awareness.
A student can begin in a strong position and lose it as they travel because they continue moving the hand without adjusting the machine to the curvature of the lip. That is why we do not treat machine angle as something students check once.
They keep checking it.
Where is the surface now?
Am I still perpendicular to the area I am actually working?
That habit becomes part of machine control.
The Machine Moves—and So Does Your Hand
Students sometimes think of machine speed as the entire speed equation. It is not. The machine has its movement, and the artist has theirs. The hand travels across the working area while the needle is cycling. The relationship between those movements affects how pigment is distributed.
If the student’s hand movement changes dramatically from one section to another, the implantation pattern changes with it. This is why simply being told a machine setting does not teach machine technique. The artist still has a hand. And that hand is part of the system.
Students need to become aware of their own movement rather than concentrating so intensely on the machine that they stop noticing what their hand is doing.
Hand Speed and Machine Speed Have to Work Together
Hand speed affects how long the needle repeatedly interacts with a given working area as the artist moves. Machine speed affects the rate at which the needle cycles. Those variables do not exist independently. The student needs to understand their relationship.
Moving the hand more slowly changes the amount of interaction occurring over an area. Moving faster changes it again. Changing the machine while keeping the hand exactly the same changes another part of the equation.
This is why we do not want students leaving class believing there is one magic machine number that produces perfect Lip Blush. A setting cannot compensate for an artist who does not understand their own movement. We want the student to begin recognizing cause and effect.
I changed this. What happened? I moved differently. What did that do to the coverage?That is how machine settings become meaningful rather than arbitrary numbers.

Pressure Is Not the Same Thing as Depth
Pressure and depth are closely related during physical execution, but they are not interchangeable words. Students need to understand the difference.
Pressure describes how the artist is physically loading the hand and machine against the working surface. Depth describes where the needle is actually interacting within the tissue during pigment implantation.
Simply pushing harder is not a professional strategy for creating better color.
It can instead be a sign that the artist is trying to solve a coverage problem with force. If pigment is not building as expected, the student needs to assess the complete technique.
What is the hand speed?
What is the machine doing?
What is the working angle?
Is the movement consistent?
How is the tissue responding?
What has already been done in this area?
More pressure should not become the automatic answer to every technical problem.
Needle Depth Is Controlled, Not Memorized
Needle depth is one of the subjects students naturally want reduced to a number.
But a number by itself does not teach depth control.
The visible needle protrusion from a cartridge is not automatically the same thing as the actual depth of pigment implantation in tissue. The artist’s hand, pressure, working angle, machine, cartridge, movement and the tissue itself all affect the working relationship. This distinction is also reflected in professional PMU education discussing protrusion versus actual implantation depth. Students therefore need to learn control.
The question is not simply:
How far is the needle sticking out?
The more important question is:
What is my technique actually doing to the working surface?
This is why depth education belongs beside pressure, speed, movement and angle. Separating depth from every other variable creates a false sense that one measurement can guarantee the result.
Understanding Pigment Implantation
Machine technique ultimately has a purpose: controlled pigment implantation. Students are not moving the machine simply to complete a pattern. They are using repeated, controlled movement to build pigment across the planned working area.
The quality of that implantation becomes visible in the coverage.
Is one area noticeably stronger than another?
Are there gaps?
Has the student repeatedly worked one small area while neglecting the rest?
Is the vermillion border becoming heavier than intended?
Is the student trying to make the first pass look finished?
These questions turn machine practice into evaluation rather than repetition. The artist needs to know not only how to make a movement but how to look at what that movement produced.
Saturation Is Built
Controlled saturation is one of the central skills in Lip Blushing machine technique. The artist is building coverage across the lips. That does not mean trying to force the finished intensity into the tissue immediately.
Students need to understand that passes give them opportunities to build, evaluate and refine. Practice-based PMU education commonly emphasizes gradual layering and checking coverage rather than attempting maximum saturation in the first pass. After a pass, look.
What coverage has been created? Which areas are consistent? Which areas are lighter? Is the difference real, or are you simply staring at one section too closely? Does the entire lip need another pass, or does the next decision need to be more selective? This is where saturation becomes a thinking process. The artist works, assesses, then decides.
What a Pass Actually Does
A pass is not simply another trip over the lips. Each pass should have a purpose. The first pass gives the artist information about how the coverage is beginning to develop.
The next decision should be based on that information. If students automatically perform the same number of passes every time without looking at what each pass accomplished, they are following a formula rather than responding to the work.
We want students to understand the sequence:
Work → evaluate → decide → continue where appropriate.
That is different from:
Pass one → pass two → pass three because somebody told me there are always three passes.
The tissue and the coverage need to remain part of the decision.
Workflow: How the Artist Moves Through the Lips
A Lip Blushing workflow gives the artist an organized way to move through the working area.
Without a workflow, students can begin chasing whatever section looks lightest.
They move from the upper lip to the lower lip, back to a corner, across to the other side and then return to an area they have already worked several times because they have lost track of what has been done. That makes coverage harder to evaluate.
A structured workflow gives the artist a mental map of the technical procedure. The lips can be thought of in workable areas rather than one large surface that needs to become “finished.” Section-based workflows are also used in professional Lip Blush instruction to help artists maintain precision and evaluate coverage systematically. The exact workflow being practiced needs to make sense from beginning to end.
Where are you starting?
What section comes next?
How will you transition across the center?
How will you reach the opposite corner?
When will you stop and evaluate the complete lip?
The purpose is not rigidity.
The purpose is awareness.

Moving From One Corner of the Lip to the Other
Even coverage requires the artist to think beyond the small section directly underneath the needle. You are working locally, but you are building a complete lip. That means transitions matter.
The student needs to understand how one working area connects with the next so the final coverage does not look like separate blocks of saturation. As the artist moves across the curvature of the lips, they also need to keep repositioning.
The body position changes.
The hand position changes.
The machine angle changes relative to the curved surface. The visual relationship between completed and uncompleted areas changes. This is why workflow and machine control belong together. Workflow tells the artist where they are going. Control determines what happens while they get there.
Coverage Should Be Evaluated Between Passes
Students need to learn to stop and look. That sounds simple, but it is a skill. When an artist becomes focused on machine movement, the instinct can be to keep moving until the lip feels complete. Evaluation interrupts that autopilot.
After a pass, assess the overall coverage. Look for areas that are lighter or heavier. Compare both sides. Look at the transition between sections. Look at the border. Look at the center. Then decide what the next pass is actually for. Controlled Lip Blush practice emphasizes this cycle of layering, checking distribution and refining rather than automatically adding intensity everywhere.
The artist should be able to answer:
Why am I going back into this area?
If there is no answer beyond “because I’m doing another pass,” stop and reassess.
How Much Saturation Should You Build?
There is no single amount of saturation that belongs on every set of lips. The intended visual result matters. The tissue matters. The coverage already created matters. The artist needs to understand what they are trying to produce and then build toward it deliberately.
A soft, barely-there Lip Blush and a more visibly saturated result are not executed with identical goals. This is also where color planning and machine execution meet without becoming the same subject.
The Lip Pigment & Color Training page owns the decision about desired color direction and visual intensity. This page answers the physical question:
How do I control the machine and workflow to build the intended coverage?
Different Lips Require Different Levels of Restraint
Technique should respond to the tissue in front of the artist. A younger lip and a mature lip do not automatically present the same working surface. Age alone is not a formula, and students should not assume every younger person can tolerate more work or every older person requires the same reduced approach. The artist evaluates the actual tissue.
How is it responding?
How is the coverage developing?
How much work has already been performed?
Does the next pass have a clear purpose?
Mature tissue reinforces an important lesson for students: technical control includes knowing when to be conservative. The goal is never to complete a predetermined amount of machine work simply because that amount was written into a formula.
Machine Position: Staying at 90 Degrees to the Lip Surface
Machine angle matters.
At BrowBeat Certification, we teach students to work with the machine at approximately 90 degrees to the surface of the lip being worked. That last part matters because the lips curve.
Ninety degrees is not one frozen position that the artist establishes at the beginning of the procedure and maintains while traveling across the entire mouth.
The surface changes. So the artist changes with it.
As you move through the lip body, toward a corner or around a curve, your hand and machine need to reposition so the needle remains appropriately oriented to the specific surface underneath it. This requires awareness.
A student who becomes focused only on moving across the lip can gradually lose the working angle without realizing it. That is why positioning needs to become part of the workflow rather than something the artist checks once. Move. Reposition. Check your angle. Continue. The lip changes underneath you, so your position changes with it.
Hand Speed and Machine Speed Have to Work Together
Students often want one number. What speed should the machine be? But machine speed alone does not explain what is happening at the lip. The artist’s hand is moving too. That relationship matters.
If the machine is operating while the hand travels across the lip, the amount of interaction occurring in an area is influenced by how those movements work together.
This is why copying another artist’s machine setting without understanding their hand movement teaches only half of the equation. The student’s goal is to develop coordination.
Machine speed, hand speed, movement pattern, pressure and depth all contribute to implantation. Change one variable and the behavior of the technique changes. We want students to understand those relationships instead of believing that one machine setting automatically produces one result.
Pressure and Depth Are Not the Same Thing
Pressure and needle depth are connected to machine control, but they are not interchangeable concepts. Pressing harder is not a professional strategy for getting more pigment into the lip.
Neither is trying to force saturation because an area does not appear strong enough after the first attempt. Students need to develop control over the machine without using force as a substitute for technique.
This is especially important when frustration enters the procedure. An area looks lighter. The instinct can be to push harder. Stop. Look at the entire process instead.
Was the hand movement consistent?
Was the machine held appropriately to the surface?
Was the area worked in the same way as the surrounding areas?
Is the student judging too early?
The solution to uneven coverage is not automatically more pressure.
Needle Depth Is Controlled, Not Memorized
Students understandably want certainty when learning depth. They want a number they can memorize and reproduce. But professional machine control requires the artist to develop awareness of what the needle is doing in the tissue rather than relying on one number as an answer for every lip. The goal is controlled pigment implantation.
Too little control can produce inconsistent work. Trying to compensate with excessive pressure or aggressive repetition creates another problem. So we teach depth as part of the larger technical relationship.
Angle.
Movement.
Speed.
Pressure.
Depth.
Tissue response.
Coverage.
They need to be read together.

Understanding Pigment Implantation
Pigment implantation is the physical process that turns the artist’s color plan into color within the lip. That sounds obvious, but it is an important distinction for students.
Knowing which pigment you want is not the same as knowing how to implant it.
Students need to learn what controlled implantation looks like across the lip and how their machine technique influences consistency. This is where the artist begins connecting the individual mechanics.
- Machine position influences how the needle approaches the surface.
- Movement determines how the artist travels through an area.
- Hand speed affects how quickly that movement progresses.
- Pressure and depth influence the interaction with the tissue.
- Passes allow coverage to be evaluated and built.
None of those variables exists alone. Together, they create the physical technique.
Saturation Is Built, Not Forced
Saturation is not a contest to see how much pigment can be put into the lip. It is controlled coverage built toward the intended result. This distinction changes the student’s workflow.
Instead of trying to make every area look finished immediately, the artist works systematically, evaluates what has been achieved and determines what still needs attention. That creates a much more useful question than:
“How do I get more color in?”
The better question is:
“What does this area need now?”
Perhaps it needs additional coverage. Perhaps another area needs to catch up. Perhaps the intended result is already being achieved and the artist needs to stop. Knowing when not to continue is part of saturation control too.
What a Pass Actually Does
A pass gives the artist an opportunity to implant pigment and then assess what that stage of work accomplished. It should not be treated as an automatic unit where every lip receives the same number simply because that is the artist’s routine.
After a pass, look. Where is coverage developing evenly? Where is it lighter? Are there areas the artist has unintentionally worked more heavily? How is the tissue responding? How does the current coverage compare with the intended result? Then the next decision is based on what is actually present.
This makes passes part of the artist’s assessment process, not simply repetitions of the same movement.
How to Think Between Passes
The space between passes is where the artist needs to stop being mechanical and start evaluating. Do not automatically begin the next pass because the previous one ended.
Look at the lips.
Compare the left and right sides.
Look at the upper lip and lower lip together.
Check the center.
Check the corners.
Look for areas that are lighter or more developed.
Look at the tissue.
Then decide what the next pass is supposed to accomplish. This creates intention. One pass establishes information for the next. The artist is no longer repeating a formula. They are responding to what they see.
Workflow: Working the Lip as a Whole
A Lip Blush procedure needs an organized workflow. Without one, students can begin chasing individual areas.
- A spot looks light, so they work it.
- Then another spot looks light, so they jump there.
- Then they return to the first side.
Before long, the artist has lost track of how much work each area has received.
A systematic workflow prevents that. The student needs a clear way to progress across the lips, maintain orientation and understand what has already been worked.
The exact procedure is not about racing from one corner to the other. It is about maintaining enough structure that coverage can be compared intelligently.
The artist should know where they are in the workflow and what they are trying to accomplish at that stage.
Moving From One Area of the Lip to Another
The lips are not one flat rectangle. The artist moves through curves, corners, the upper lip, the lower lip and the central body while maintaining control over angle and movement. Transitions matter.
As the working area changes, the artist needs to reposition rather than stretching one hand position beyond where it remains effective.
This is particularly important when maintaining the approximately 90-degree relationship between the machine and the surface being worked. The artist moves around the lip. The machine should not simply lean farther and farther as the surface curves away. Reposition the hand. Reposition the body when necessary.
Re-establish the working angle. Then continue.
Good workflow is partly about pigment coverage and partly about putting yourself in a position where you can maintain technical control.

Where the Artist Sits Is Part of Machine Technique
Body position affects hand position. Hand position affects machine control. That makes ergonomics part of the technical conversation. If the artist is reaching awkwardly across the client, twisting the wrist or trying to work an entire lip from one fixed body position, maintaining consistent movement and angle becomes harder.
Students need to become comfortable repositioning themselves as the working area changes. You do not get extra points for staying in one chair position throughout the entire procedure. Move when the work requires you to move. The objective is control.
Position yourself so you can see the area clearly, stabilize your hand and maintain the intended relationship between the machine and the lip surface.
Coverage Should Be Evaluated Across the Entire Lip
Coverage problems become easier to create when the artist evaluates only the small area directly underneath the needle. Students need to zoom their thinking in and out. Close-up attention is necessary for technical precision.
But the artist also needs to stop and look at the complete lip. Is one side visually stronger? Is the upper lip developing differently from the lower lip? Are the corners consistent with the body? Is the center receiving the amount of color intended for the design?
That wider assessment tells the artist where the workflow needs to go next.
This is how even coverage is built deliberately instead of discovered accidentally at the end.
Not Every Lip Needs the Same Amount of Saturation
There is no single saturation level that defines a successful Lip Blush. The intended result matters. The client’s natural lip matters. The condition and characteristics of the tissue matter.
And the artist needs to assess what is happening during the procedure rather than deciding in advance that every person receives the same amount of work.
A younger client’s lips and a mature client’s lips are not automatically approached as identical tissue simply because the requested color is similar. The artist observes the tissue in front of them and works conservatively when the tissue calls for a more conservative approach.
The goal is not to complete a predetermined amount of machine work. The goal is to create the intended coverage while maintaining control.
Working With Mature Lip Tissue
Mature lips require observation. Age alone does not tell the artist everything about the tissue, but it is one of the reasons students need to stop expecting every lip to behave identically. The artist needs to look at the actual tissue, evaluate how it responds and avoid using force or excessive repetition to chase a visual target.
A mature client can still want beautiful, noticeable lip color. Working thoughtfully does not mean deciding that older clients are only allowed extremely light results.
It means the artist adapts the workflow to the tissue instead of demanding that the tissue adapt to a rigid formula.
Soft Centers, Ombre Effects and Intentional Coverage
Even saturation is not always the artistic goal. A client can want more color through the outer areas of the lip with a softer appearance toward the center. That is an intentional saturation pattern. The difference between an intentional gradient and accidental patchiness is planning and control.
The artist needs to know where stronger coverage belongs, where the transition begins and how the color should soften as it moves through the lip. This is where workflow becomes part of the design. You are not simply trying to “fill the lips.”
You are controlling where pigment presence increases, where it decreases and how those areas transition into one another. The same machine fundamentals still apply.
Angle.
Movement.
Speed.
Pressure.
Depth.
Passes.
Assessment.
What changes is how those skills are used to build the intended saturation pattern.
The Vermillion Border, Cupid’s Bow, Corners and Lip Body Require Control
The entire lip is connected, but every area does not present the artist with the same physical working position. The broad body of the lip gives the artist a different surface from the corners. The Cupid’s bow creates curves and changes in direction. The vermillion border demands precision because the artist is working close to the edge of the mapped design.
This is where students need to separate design from execution. The map has already established where the artist intends to work. Machine technique determines how the artist works within that plan.
As the surface changes, the artist repositions the hand, machine and body to maintain visibility, stability and the appropriate working angle. The goal is not to find one comfortable hand position and force the entire lip to fit it. The goal is to stay in control as the working area changes.
For detailed education on establishing the shape, Cupid’s bow, proportions and vermilion border before machine work begins, see our Lip Mapping Training guide.
Needles and Cartridges Are Part of Machine Education
The cartridge at the end of the machine is part of the technical system the student needs to understand. Students should know that needle and cartridge choices are not simply product preferences.
Different configurations change how to pigment implants, which is why cartridge education belongs alongside machine control rather than being treated as an unrelated equipment lesson.
At BrowBeat Certification, students are introduced to multiple cartridges appropriate to the techniques being taught so they can begin understanding how cartridge selection relates to the work they are trying to perform. The purpose is not to memorize a shopping list. The purpose is to understand the tool.
What is at the end of the machine? How does that configuration relate to the technique? What does the artist need to control when using it? Those questions are more useful than learning that one cartridge is simply someone’s favorite.

Why More Pressure Does Not Mean Better Saturation
When students see an area that looks lighter than expected, one instinct is to become more aggressive.
More pressure.
Slower movement.
More passes.
More time in the same spot.
That is exactly when the artist needs to think rather than react. Uneven saturation is information. It tells the artist to evaluate the technique.
Was the working angle maintained?
Did hand speed change?
Was the movement consistent?
Has this area already received more work than the surrounding tissue?
What is the tissue showing?
The answer is not automatically to do more. Sometimes the most important technical decision is to stop trying to force the lip to look finished in that moment.
Knowing When to Stop Is Part of Machine Control
Students spend a lot of time thinking about how to put pigment into the lips. They also need to learn when to stop. Stopping is a technical decision.
If the artist believes every pass must produce a predetermined amount of visible color, they can continue working simply because the lip has not matched the image they had in their head yet. That is not assessment. The artist needs to look at both coverage and tissue response. More work is not automatically better work.
The objective is not to prove that another pass can be completed. The objective is controlled implantation appropriate to the lip in front of you.
This becomes especially important when working with tissue that is responding differently than expected. The artist needs enough discipline to adjust the plan rather than trying to overpower the tissue with repetition.
Common Lip Blush Machine Technique Mistakes
Technical mistakes are easier to correct when students understand which part of their machine control is creating the problem.
Losing the 90-Degree Working Angle
The lips curve, so machine position needs to change as the artist moves. If the artist maintains one fixed hand position while the surface changes underneath the machine, the working angle changes too. Reposition as you move so the machine remains approximately perpendicular to the area being worked.
Copying a Machine Setting Without Copying the Movement
A machine setting does not exist independently from hand movement. Two artists using the same setting can create very different interactions with the tissue if their hand speed and movement patterns differ. Students need to understand the relationship rather than memorize a number.
Using Pressure to Compensate for Poor Coverage
More pressure is not the automatic solution to light or inconsistent saturation. Evaluate angle, movement, speed, depth, previous passes and tissue response before deciding what the area actually needs.
Chasing Individual Light Spots
Jumping repeatedly from one lighter area to another makes it difficult to track how much work each section has received. Use an organized workflow, assess the complete lip between passes and make the next decision from the overall coverage.
Working the Entire Lip From One Body Position
If the artist has to reach, twist or lean the machine to access an area, reposition.
Your body position should support the hand position required for controlled work.
Trying to Finish the Lip in the First Pass
A first pass does not need to answer every saturation question. Work systematically, evaluate what the pass accomplished and use that information to determine what the next stage needs.
Repeating the Same Workflow on Every Client
A workflow gives the artist organization. It should not remove observation. The amount of work, tissue response, desired saturation and individual lip characteristics still need to be assessed throughout the procedure.
Confusing Stronger Color With Better Technique
Visible intensity alone does not prove that machine technique is controlled. A soft result can require excellent control. A stronger result can require excellent control.
The technical question is whether the artist created the intended coverage consistently and deliberately.
Machine Practice Should Isolate Skills Before Combining Them
Watching an instructor use a PMU machine and controlling one yourself are completely different experiences. The student’s hand needs practice. But simply moving a machine repeatedly is not enough.
Practice becomes more useful when the student knows which skill they are trying to improve. One exercise can focus attention on movement. Another can make the student more aware of consistency. Another can help the student recognize how speed changes the way they work. Another can focus on maintaining machine position as the working surface changes. Eventually those skills need to happen together.
But separating them during learning makes it easier to understand what is working and what needs improvement. That is how physical technique develops: isolate, practice, evaluate, adjust and combine.
Muscle Memory Is Useful Only When the Movement Is Controlled
Repetition builds familiarity. But repeating an uncontrolled movement simply makes the uncontrolled movement more familiar. Students need feedback during practice.
Is the machine position consistent?
Is the hand accelerating without the student realizing it?
Is pressure changing as the student becomes tired?
Does the movement change when working in a less comfortable direction?
Can the student reproduce the movement deliberately?
The purpose of machine exercises is not to complete a certain number of lines or motions. The purpose is to make the student increasingly aware of what their hand is doing.
From Individual Movements to a Complete Lip Workflow
Eventually, students need to stop thinking about each machine skill as an isolated exercise. The skills begin connecting. The artist positions themselves. They stabilize. They establish the working angle. They move through an area with controlled hand movement. They maintain awareness of speed, pressure and depth. They progress through the lip systematically.
They stop.
They look.
They evaluate coverage.
They assess the tissue.
Then they decide what happens next.
That is workflow.
Not a rigid formula that ignores the person. A structured process that keeps the artist oriented while still leaving room to respond to what the lip is showing them.
Dark Lip Neutralization Still Requires Controlled Machine Technique
Machine control remains important when working with darker and melanin-rich lips. The physical principles of controlled movement, positioning, pressure, depth, passes and tissue assessment do not disappear because the color strategy changes. But the color strategy does change.

How Students Learn Lip Blush Machine Technique
Learning Lip Blush machine technique is not one exercise. It is a progression. A student cannot realistically concentrate on machine position, hand movement, speed, pressure, depth, coverage, passes and an entire lip workflow all at once when those physical skills are still new. That is why technical training needs to break machine work down before asking the student to put everything back together.
First, students need to become comfortable holding and controlling the PMU machine. Then they need to become aware of movement.
Is the hand traveling consistently?
Is the machine remaining stable?
Is the student maintaining the intended angle to the working surface?
Does the movement change when the direction changes?
Once those fundamentals become more familiar, additional variables can be layered into the exercise.
Speed.
Pressure.
Depth.
Coverage.
Transitions.
Eventually, the student needs to connect those individual machine skills into a complete Lip Blush workflow. This is the difference between watching machine technique and learning machine technique. Watching shows you what a movement looks like. Structured practice teaches you what your own hand is doing.
Machine Exercises Build Awareness Before They Build Speed
Early machine practice is not about becoming fast. It is about becoming aware.
A student needs enough repetition to recognize when their movement changes, when their angle begins drifting, when pressure becomes inconsistent and when they lose control as they move into a less comfortable working direction. That is why practical Lip Blush machine exercises should have a purpose.
An exercise can isolate consistency. Another can focus on movement. Another can require the student to maintain approximately 90 degrees as the working position changes. Another can help the student understand how controlled passes build coverage. The exercise itself is not the final skill.
It gives the student a controlled environment in which to recognize and correct the movement before multiple technical demands are combined.
From Machine Exercises to Lip-Shaped Practice
There is an important transition between practicing a machine movement and using that movement within the shape of a lip. A straight practice area does not have a Cupid’s bow. It does not narrow into corners.
It does not require the artist to move around a curved upper and lower lip while continually changing their own working position. Once students begin applying machine fundamentals to lip-shaped practice, the technical problem becomes more realistic.
Now the student has to maintain control while changing direction. They need to think about where one working area ends and another begins. They need to reposition rather than allowing the machine angle to collapse. They need to understand how individual sections eventually become one continuous, evenly worked lip.
This is where isolated machine skills begin turning into practical Lip Blush technique.
Learning Machine Technique Means Learning to Self-Correct
Professional machine skills do not come from never making a mistake during practice. They develop when the student can recognize what changed and identify the technical variable responsible. If coverage becomes inconsistent, ask why.
- Did hand speed change?
- Did the working angle change?
- Did pressure increase?
- Did the student lose stability?
- Did they repeatedly work one area while trying to make it visually match another?
That diagnostic thinking is part of machine education. Without it, the student knows only that something looks wrong. With it, the student begins to understand what to adjust.
The objective of professional Lip Blush machine training is not to create a student who can reproduce one memorized movement under one set of conditions. It is to develop an artist who understands the mechanics well enough to recognize what their own hand and machine are doing.

Machine Technique Training Within BrowBeat Certification
At BrowBeat Certification, we want students to understand what their movement is doing. That means machine education cannot stop at a speed setting or a demonstration. Students need to connect the pieces.
How am I positioned?
Am I stable?
Is my machine 90 degrees to the surface I am working?
What is my hand doing?
How does my hand speed relate to the machine?
What pressure am I using?
Am I maintaining controlled depth?
What did this pass accomplish?
How is coverage developing?
What is the tissue telling me?
What should I do next?
That sequence turns machine work from a memorized movement into a technical decision-making process. The goal is not simply to make the machine move. The goal is to know what your movement is doing.
Learn to Control the Machine, Not Just Move It
Machine technique becomes useful when the student stops thinking of the machine as something they simply move across the lips. Every movement is doing something.
Your position matters.
Your angle matters.
Your hand speed matters.
Pressure matters.
Depth matters.
Where you are in the workflow matters.
What happened during the previous pass matters.
And the tissue in front of you matters.
That is why we teach students to work from a framework rather than one rigid formula.
Position yourself.
Stabilize.
Establish your working angle.
Work systematically.
Stop.
Look.
Assess the coverage.
Assess the tissue.
Then decide what the next movement needs to accomplish. Once a student understands that process, the machine stops being something they are trying to keep up with. It becomes a tool they are learning to control.
As students explore lip blushing machine technique training, it is also important to consider the overall value of the education behind the technique. Lip Blushing Course Cost & Training Pricing looks beyond a single price point to explain what contributes to the value of professional training, what students should consider when comparing programs, and how the depth of education can influence the overall training investment.
Lip Blush Machine Technique FAQs
What is Lip Blush machine technique training?
Lip Blush machine technique training teaches PMU students how to physically control pigment implantation in the lips. It covers machine position, movement, hand speed, pressure, depth, passes, cartridges, saturation, workflow and coverage assessment.
Should the PMU machine be held at 90 degrees during Lip Blushing?
Yes. BrowBeat teaches the machine at approximately 90 degrees to the specific lip surface being worked. Because the lips curve, the artist continually repositions the hand, machine and body to maintain that perpendicular relationship as the working area changes.
Why does the artist need to reposition while working across the lips?
The lip surface changes angle as the artist moves through the body, curves, Cupid’s bow and corners. Repositioning allows the artist to maintain visibility, stability and an approximately 90-degree machine position instead of leaning the machine farther away from the intended working angle.
What is the difference between machine speed and hand speed in Lip Blushing?
Machine speed describes the operation of the machine, while hand speed describes wrist action and how quickly the artist moves across the working area. The two work together, so a machine setting cannot be evaluated separately from the artist’s movement.
Is there one correct machine speed for every Lip Blush procedure?
No. One machine-speed number does not define correct Lip Blush technique because hand movement, pressure, depth, cartridge choice, tissue response and the intended result also affect implantation. Students need to understand how the variables work together.
Is pressure the same as needle depth?
No. Pressure and needle depth are separate parts of machine control. Pressing harder is not a substitute for controlled depth and should not be used as an automatic response when an area appears lighter than expected.
How deep should the needle go during Lip Blushing?
Needle depth is controlled through technique rather than reduced to one universal number for every lip. Students learn to evaluate depth alongside machine angle, movement, speed, pressure, tissue response and the quality of pigment implantation.
What is pigment implantation in Lip Blushing?
Pigment implantation is the physical introduction of PMU pigment into the lip through controlled machine work. Consistent implantation depends on the relationship between machine position, movement, speed, pressure, depth, passes and tissue response.
What does saturation mean in Lip Blushing machine technique?
Saturation describes the development of pigment coverage within the lips. From a machine-technique perspective, saturation is built through controlled implantation and evaluated throughout the workflow rather than forced through excessive pressure.
How many passes are needed for Lip Blushing?
Passes are not treated as a fixed number that every lip automatically receives. Each pass gives the artist information about coverage and tissue response, and the next decision is based on what the lip needs rather than completing a predetermined count.
What should an artist check between Lip Blush passes?
Check overall coverage, the relationship between the left and right sides, upper and lower lips, center, corners, lighter areas and tissue response. The next pass should have a specific purpose based on that assessment.
How do you create even Lip Blush coverage?
Even coverage is built through an organized workflow, consistent machine control and repeated assessment of the entire lip. The artist works systematically, evaluates coverage between passes and addresses what the lip actually needs.
Why is workflow important during Lip Blushing?
A structured workflow helps the artist track which areas have been worked, compare coverage and avoid repeatedly jumping between individual spots. It creates organization while still allowing the artist to adjust according to tissue response and the intended result.
Does where the artist sits matter during Lip Blushing?
Yes. Body position affects hand position, visibility, stability and machine angle. The artist should reposition as necessary rather than reaching or twisting to work the entire lip from one fixed position.
Do the lip corners require different machine positioning?
The corners require the artist to adapt position because the working surface and access change. The artist repositions the hand, body and machine to maintain control and the appropriate angle to the specific surface being worked.
Is stronger saturation always better in Lip Blushing?
No. The correct amount of saturation is the amount appropriate to the intended result and the lip being worked. A soft result and a stronger result both require controlled implantation; visible intensity alone does not define good technique.
Can Lip Blushing have a softer center or ombré effect?
Yes. Coverage can be intentionally designed with greater color presence in some areas and a softer transition toward others. The artist controls where saturation builds and where it decreases so the gradient is deliberate.
Should younger and mature lips receive exactly the same amount of machine work?
No. The artist assesses the actual tissue rather than applying a fixed amount of work based on a formula. Tissue characteristics, response during the procedure and the intended result guide how conservatively or extensively the artist proceeds.
How should an artist approach mature lip tissue?
Assess the tissue in front of you and respond to how it behaves. Mature clients are not automatically limited to extremely light color, but the artist should never use excessive pressure or repetition to force the tissue toward a predetermined visual target.
How do you know when to stop working the lips?
Stop based on coverage, tissue response and the intended result—not because a fixed number of passes has been completed. Knowing when additional machine work is no longer appropriate is part of technical control.
Does Lip Blush machine training include needles and cartridges?
Yes. Needle and cartridge education belongs within machine training because the configuration at the end of the machine affects implantation. BrowBeat introduces students to multiple cartridges appropriate to the techniques being taught.
Is machine technique the same as lip mapping?
No. Mapping is planning; machine technique is execution. Mapping establishes the intended shape and working area, while machine technique controls how pigment is implanted within that design.
Is machine saturation the same as choosing how strong the Lip Blush color should look?
No. Desired color intensity is a color-planning decision, while machine saturation is the physical process of building pigment coverage.
Does Dark Lip Neutralization use machine technique?
Yes. Dark Lip Neutralization still requires controlled machine positioning, movement, pressure, depth, passes and implantation. Corrective color selection for dark and melanin-rich lips is a separate subject.